Configuring TCP/IP for Windows 95
What Is TCP/IP?
Transmission Control Protocol/Internet Protocol (TCP/IP)
is a set of communication standards for computers connected to a network.
These standards are used for the Internet and for other networks (including
intranets) that take advantage of these standards and the many programs
that are designed to use them.
In most cases, your network administrator gives
you the necessary settings for connecting to a TCP/IP network, and you
can simply enter the settings as described in the following sections.
What Is Plug and Play?
Plug and Play is a feature of the Microsoft Windows
95 operating system that makes it easier to add hardware components to
a computer. Windows 95 detects when a hardware component that supports
Plug and Play is added and automatically configures the necessary drivers.
The Pipeline supports Plug and Play. If
you are using Windows 95, connecting to a remote site is simple: you configure
the Pipeline for the site and then use a program that connects to
the site. Windows 95 and the Pipeline take care of the rest.
Installing and configuring your Ethernet card
Before you can configure TCP/IP, you first install
and configure the Ethernet network interface card you'll use to connect
your computer to the Pipeline.
Note: If your computer already has a properly
configured Ethernet card, skip to Adding TCP/IP
support.
- Follow the directions provided by the manufacturer for installing the
Ethernet card.
You insert the card into a card slot inside your
computer's case or, for "credit card" Ethernet cards used in
portable computers, into a PCMCIA (PC card) slot.
- From the Start menu, choose Settings-->Control Panel.
The Control Panel appears.

- Double-click the Add New Hardware icon.
The Add New Hardware Wizard appears.
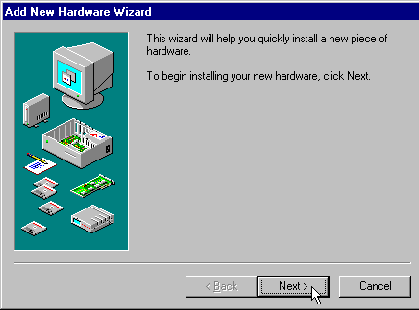
- Click Next.
You're next asked if you want to search for new hardware.
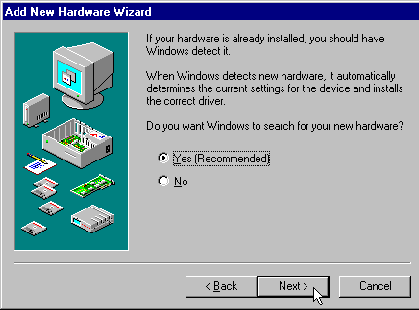
- If your Ethernet card supports Windows 95 Plug and Play, select Yes.
If it does support Plug and Play, it will be detected
and configured for you automatically. If not, see the installation instructions
provided with your card.
- Click Next.
You next receive this warning.
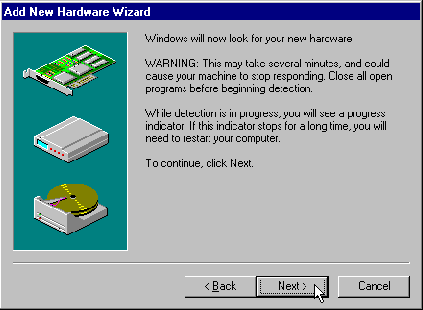
- Click Next.
The results of the detection process are then displayed.
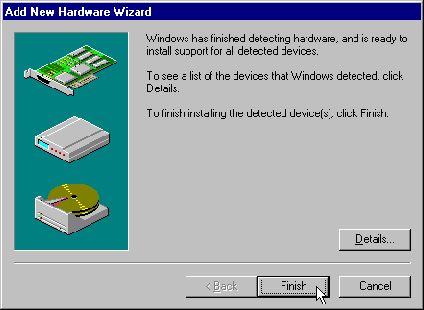
- If the card was detected, click Finish.
- When the installation process is complete, restart the computer.
Confirming the card installation
To confirm that the installation was successful,
follow these steps:
- If the Control Panel isn't already open, choose Settings-->Control
Panel from the Start menu.
The Control Panel appears.

- In the Control Panel, double-click the System icon.
The System Properties window appears.
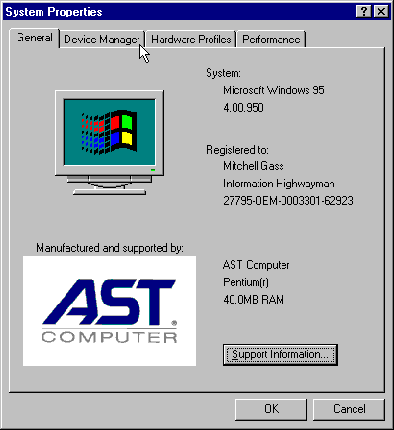
- Click the Device Manager tab.
A list of device types appears.
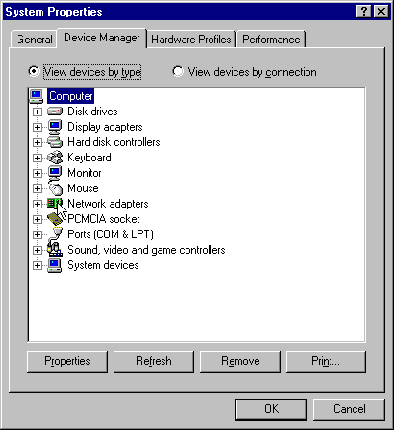
- Make sure the View Devices by Type button is selected.
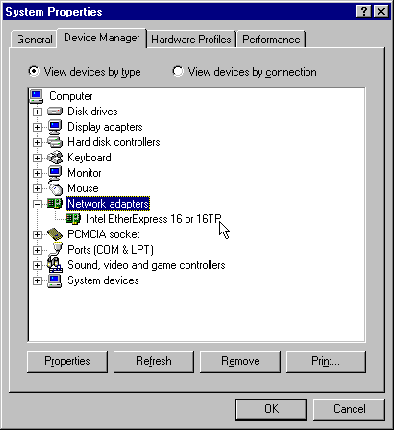
- Double-click the Network Adapters icon.
The network card you just installed should appear.
Adding TCP/IP support
For Plug and Play to work, there must be TCP/IP
support for your network card. To add the TCP/IP component (or to check to see if the
component has already been installed), follow these steps:
- If the Control Panel isn't already open, choose Settings-->Control
Panel from the Start menu.
The Control Panel appears.

- Double-click the Network icon.
The Network window appears.
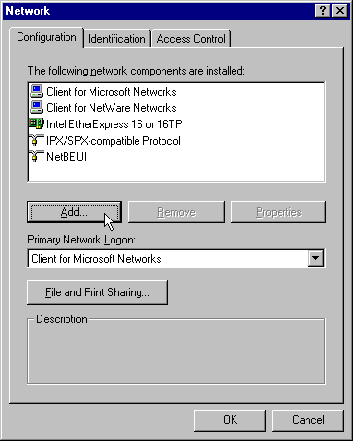
Note: If TCP/IP appears in the list of network
components, the TCP/IP component has already been installed. However, if
the component has been configured for another network connection, such
as connection to another Internet service provider, you must reset its
properties to their default values for Plug and Play to work. Skip now
to Checking the properties of the TCP/IP component
to check the properties of the TCP/IP component and make any changes that
are necessary.
- Click Add.
The Select Network Component Type window appears.
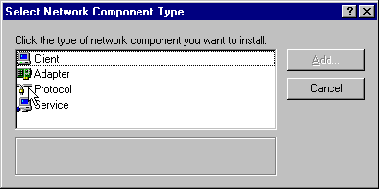
- Click Protocol and then click Add.
The Select Network Protocol window appears.
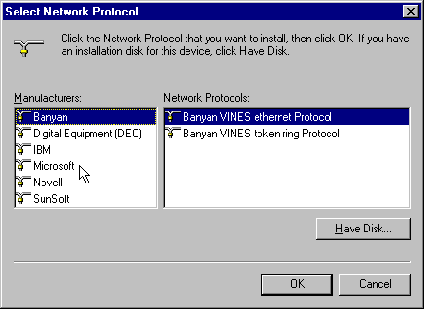
- Click Microsoft.
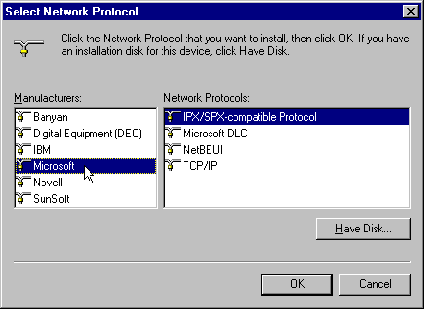
- From the list of network protocols at the right of the window, click
TCP/IP.
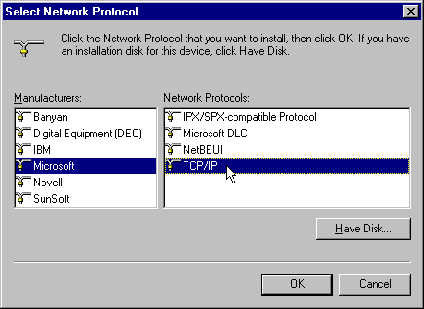
- Click the OK button in the Select Network Protocol dialog box.
- Click the OK button in the Network control panel.
- In the dialog box that appears, click the Restart button.
Checking the properties of the TCP/IP component
If you're certain that this is the first time the TCP/IP component has been
installed on your computer, skip now to Configuring
the Pipeline. If the TCP/IP component has ever been installed,
even if it was later removed, you need to make sure that all the
properties of the component have their default values. If any of the values
are different from the default values, Plug and Play might not work.
To check the values, follow these steps:
- If the Control Panel isn't already open, choose Settings-->Control
Panel from the Start menu.
The Control Panel appears.
- Double-click the Network icon.
The Network window appears.
- In the list of network components in the Network window, click TCP/IP.
- Click Properties.
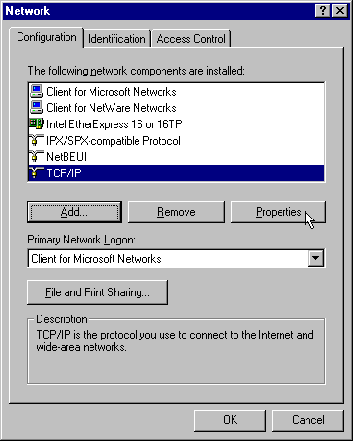
The TCP/IP Properties window appears.
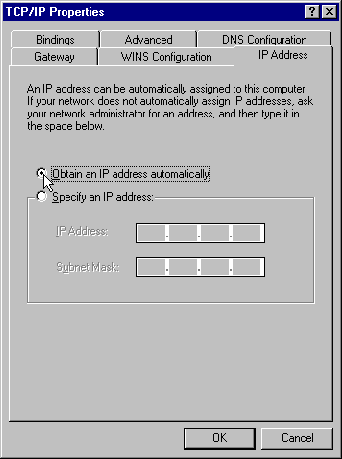
- If the IP Address tab isn't shown, click it.
- In the IP Address tab, select the Obtain an IP Address Automatically
button if it isn't already selected.
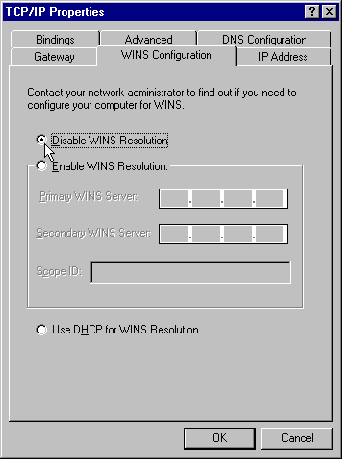
- Click the WINS Configuration tab.
- In the WINS Configuration tab, select the Disable WINS Resolution button
if it isn't already selected.
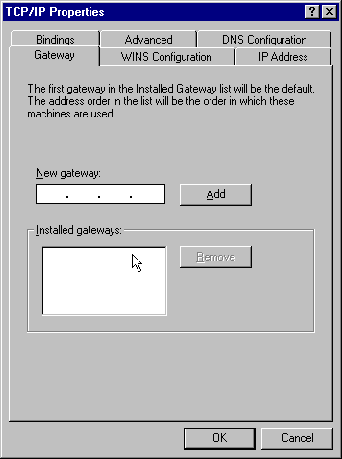
- Click the Gateway tab.
- In the Gateway tab, make sure the Installed Gateways box is empty.
If there are any gateways in the list, click each gateway and then click
the Remove button.
When you're done, the Installed Gateways box should
be empty:
- Click the DNS Configuration tab.
- In the DNS Configuration tab, select the Disable DNS button if it isn't
already selected.
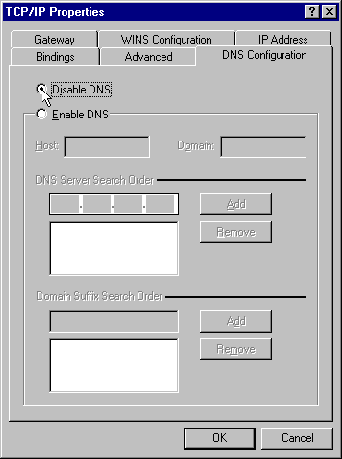
You can ignore the properties in the Advanced and
Bindings tabs. These properties do not affect Plug and Play.
Saving the TCP/IP settings
When you're done entering TCP/IP settings, follow
these steps:
- Click the OK button in the TCP/IP Properties dialog box.
- Click the OK button in the Network control panel.
- In the dialog that appears, click the Restart button.
Configuring the Pipeline
After your computer has restarted, use the Pipeline QuickStart to configure your Pipeline.
Running the network software
Once you've configured the Pipeline, run any of the programs you use to connect
to the Internet or other TCP/IP network, such as Netscape Navigator or Internet Explorer. The first time you try to connect to the network,
Windows 95 automatically configures the drivers you need for the connection. You can then use any


