Configuring TCP/IP in Windows 95
What Is TCP/IP?
Transmission Control Protocol/Internet Protocol (TCP/IP)
is a set of communication standards for computers connected to a network.
These standards are used for the Internet and for other networks (including
intranets) that take advantage of these standards and the many programs
that are designed to use them.
In most cases, a network administrator provides
the necessary settings for connecting to a TCP/IP network, and you can
simply enter the settings as described in the following sections.
To connect to a TCP/IP network, you must specify
your computer's:
- Internet protocol (IP) address
The IP address distinguishes the computer from all
other computers on the network. The address consists of four numbers from
0 to 255 separated by periods, such as
100.25.101.2
- Subnet mask
TCP/IP networks are often divided into smaller networks,
known as subnetworks, for ease of management. The subnet mask specifies
how many computers can be connected to the same subnetwork. It can be shown
in one of two ways: in the same format as an IP address, such as
255.255.255.248
or as a number following the IP address, separated
by a slash:
100.25.101.1/29
For more information about subnet masks, see the
administrator's guide or reference guide for your Pipeline.
- Default gateway
A gateway is a computer or device that connects the
network or subnetwork to another. The default gateway connects the computer's
subnetwork to any networks for which there aren't already gateways. When
you use a Pipeline to connect to a TCP/IP network, the Pipeline is the
default gateway.
- Name
A computer with an IP address can also have a name.
Like the IP address, the name distinguishes the computer from other computers
on the network. The difference is that the name is easier for humans to
read. An example of a name is
mitchbob.gassco.com
where
mitchbob
is the name of a computer and
gassco.com
is the Internet (or intranet) domain containing
the computer. A service provided on TCP/IP networks known as Domain Name
Service translates names, which are more convenient for humans, into the
corresponding IP addresses, which are used by the network software.
- Domain Name Service (DNS) servers
A domain name server is a computer that translates
names into IP addresses. To use names rather than IP addresses to specify
other computers on the network, you must also specify at least one domain
name server. In most cases, you'll specify at least two: a primary server
and a backup for cases when the primary server is unavailable.
Installing and configuring your Ethernet card
Before you can configure TCP/IP, you first install
and configure the Ethernet network interface card you'll use to connect
your computer to the network:
- Follow the directions provided by the manufacturer for installing the
Ethernet card.
You insert the card into a card slot inside your
computer's case or, for "credit card" Ethernet cards used in
portable computers, into a PCMCIA (PC card) slot.
- From the Start menu, choose Settings-->Control Panel.

- Double-click the Add New Hardware icon.
The Add
New Hardware Wizard appears.

- Click Next.
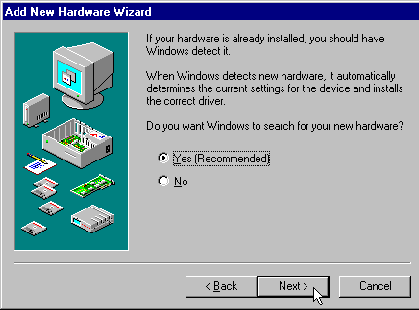
- If your Ethernet card supports Windows 95 Plug and Play, select Yes.
If it does support Plug and Play, it will be detected
and configured for you automatically. If not, see the installation instructions
provided with your card.
- Click Next.
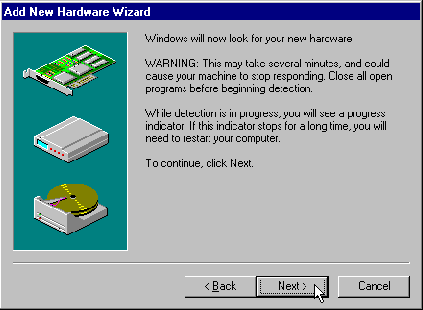
- Click Next.
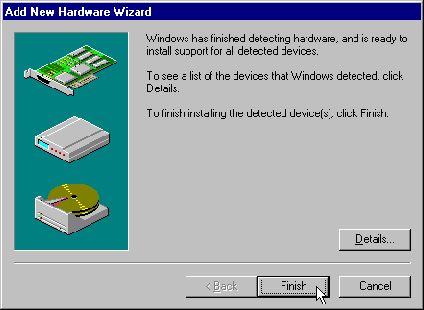
- If the card was detected, click Finish.
- When the installation process is complete, restart the computer.
Confirming the card installation
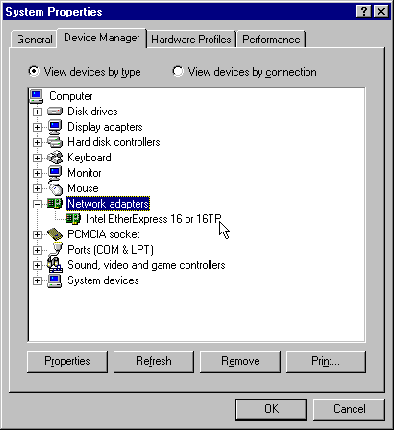
To confirm that the installation was successful,
follow these steps:
- If the Control Panel isn't already open, choose Settings-->Control
Panel from the Start menu.

- In the Control Panel, double-click the System icon.
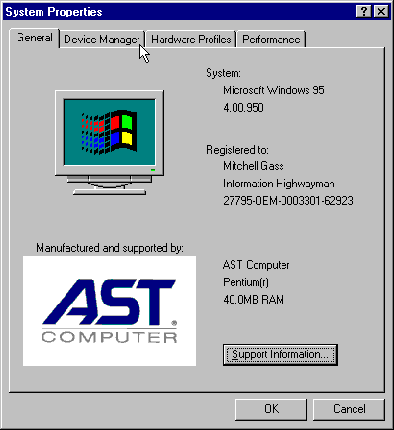
- Click the Device Manager tab.
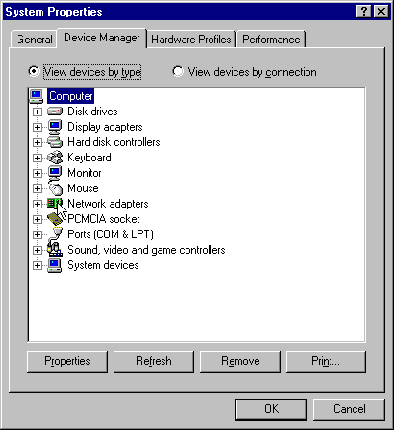
- Make sure the View Devices by Type button is selected.
- Double-click the Network Adapters icon.
Adding the TCP/IP component
To add TCP/IP support for your newly installed network
card, follow these steps:
- If the Control Panel isn't already open, choose Settings-->Control
Panel from the Start menu.

- Double-click the Network icon.
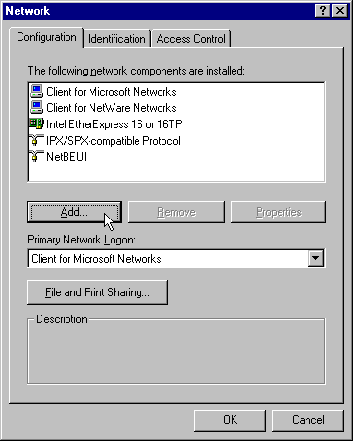
- Click Add.
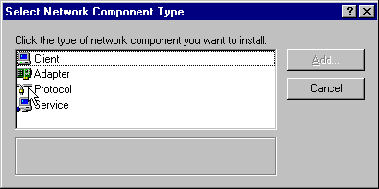
- Click Protocol and then click Add.
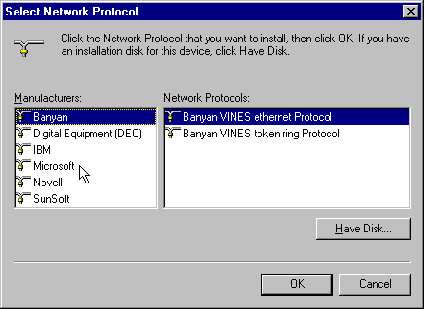
- Click Microsoft.
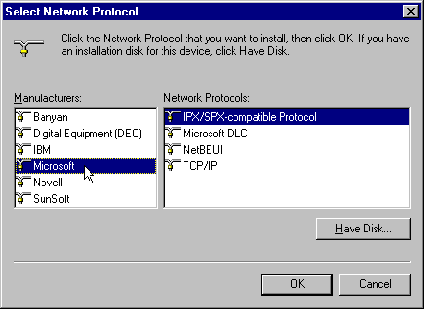
- From the list of network protocols at the right of the window, click
TCP/IP.
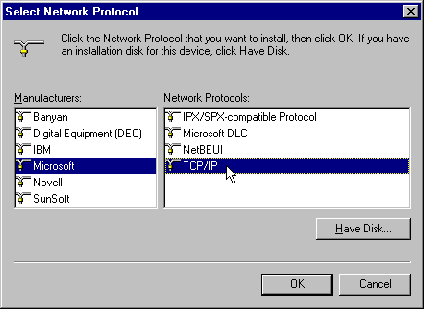
- Click OK.
Specifying TCP/IP settings
When you're done installing the TCP/IP protocol,
you're returned to the Network window. You're now ready to enter TCP/IP
settings such as your computer's IP address and name.
- From the list of network components in the Network window, click TCP/IP.

- Click Properties. The TCP/IP Properties window
appears.
Entering your computer's name and subnet mask
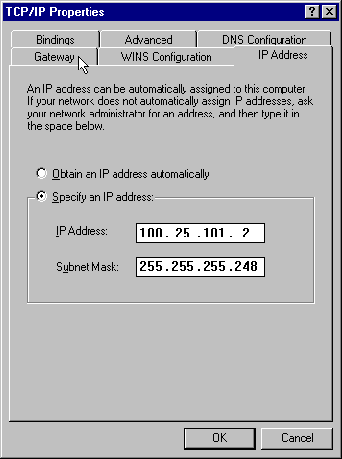
By default, the IP Address tab is shown. You enter
your first TCP/IP settings-your computer's IP address and subnet mask-in
this tab.
- Click the Specify an IP Address button.
- Enter the IP address and subnet mask in the fields provided.
Note: If any of the four numbers in the address
or mask have less than three digits, you can enter the next number by pressing
the period (.) key.
Entering the default gateway
You next specify the default gateway, which is the
Pipeline you're using to connect to the TCP/IP network.
- Click the Gateway tab. In the New Gateway field,
enter the IP address of the Pipeline and then click Add.
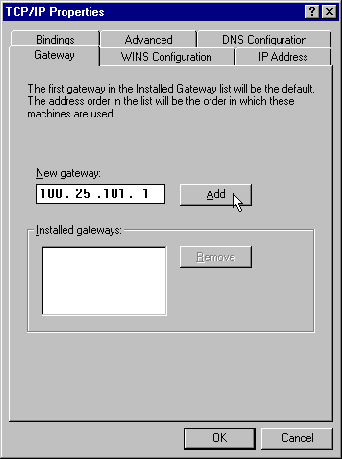
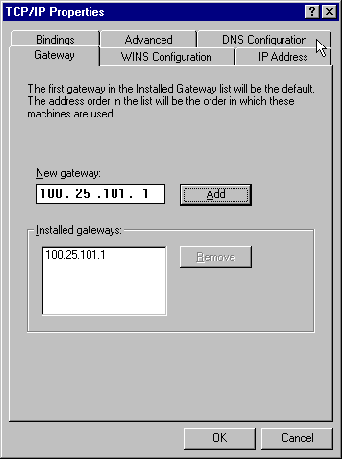
The address of the Pipeline then appears in the
list of installed gateways:
Specifying your computer's name and DNS information
The final settings you need to specify are your
computer's name, its domain, and the DNS servers it will use. You enter
these in the DNS Configuration tab.
- Click the DNS Configuration tab.
- Click the Enable DNS button if it is not already selected.
- Enter the name of your computer in the Host field.
Note: In the name, the case of letters (whether
they are upper- or lowercase) matters. Enter the name exactly as it was
given to you by your network administrator.
- Enter the domain name in the Domain field.
This name ends with a period followed by a suffix,
such as .com, .uk, or.edu.
- Enter the IP address of a DNS server in the DNS Server Search Order
field and then click Add.
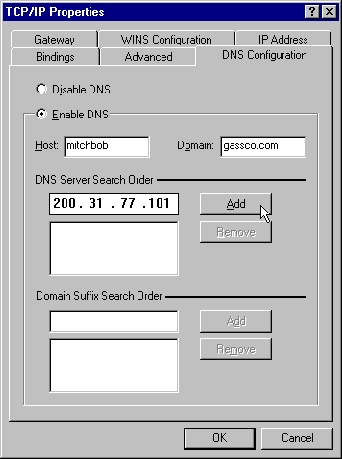
- If there is more than one DNS server, repeat step 5.
Saving the TCP/IP settings
When you're done entering TCP/IP settings, follow
these steps:
- Click OK.
- In the dialog that appears, click the Restart button.


