3.1.3 |
System View/Net View and Station View |
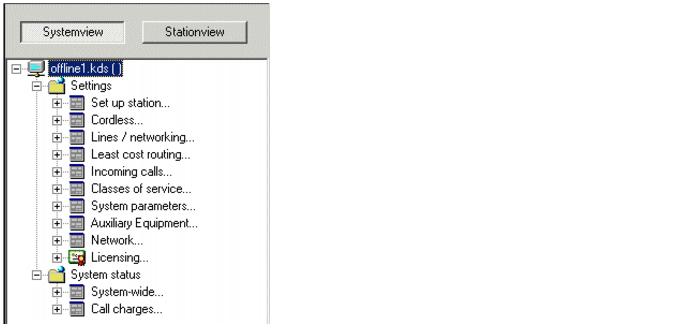
| The configuration of the communication system occurs via the System, Net and Station views. The system view shows the configuration from the viewpoint of the hardware / boards. If a network CDB has been loaded, the system view changes to the net view and includes all systems of the network. The station view can be used to obtain a quick overview of all configured stations. You can optionally switch between the various views by using the Systemview, Netview and Stationview buttons. |
| You can scale the width of the views area freely, even to the extent of making it completely invisible. To adjust the size, proceed in the same way as described for changing the column width in tables (see Section 3.4 "Table Handling"). |
System View and Net View |
| The system/net view includes navigation trees for all opened CDBs. The navigation tree provides you with quick access to the menu functions Settings and System Status (see also Section 3.1.1 "Menu bar"). You can expand or collapse individual branches of the tree by clicking the + or - symbol before the relevant entries in the navigation tree. For each opened CDB, a separate branch is created in the navigation tree. When a network CDB is loaded, the branches for each CDB are initially collapsed. |
|
|
Station view |
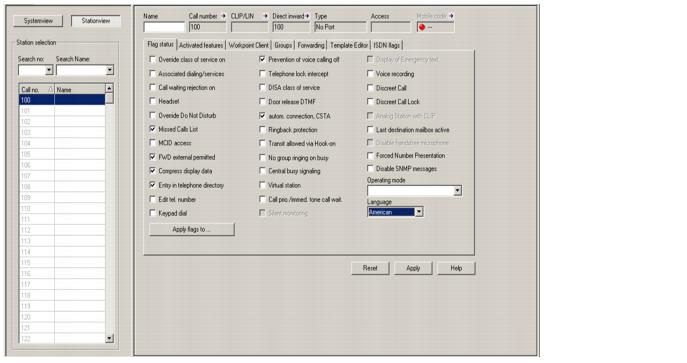
| The station view contain a table (station selection) with the call numbers and names of all stations. If a network CDB is loaded, the station view includes all stations in the network. Inactive stations are shown in gray. In the case of groups, a group icon is additionally displayed before the station name. |
| You can select a station via the Station selection. The station parameters for the selected station are displayed in the right window pane (see also Section 8.2 "Station parameters"). The stations are sorted in ascending or descending order by one of the columns (Call no. or Name). You can change the sorting order by clicking the column headers. |
| The Search no. and Search Name fields/drop-down lists can be used to find a particular station. To do this, enter a call number or a name in the fields or select an entry from the drop-down lists. As you enter each character, the first (or closest) hit in the table is highlighted and can be made visible by moving the table. In this case, the table is automatically sorted in ascending order by the call number or name. On pressing the Enter key, the highlighted station is selected, and the station parameters/details for that station are displayed in the right window pane. |
| Due to system restrictions, not all parameters in the station view can be set for the selected station. This applies, in particular, to the call numbers, groups and forwarding. The arrow symbol on the right next to each parameter enables you to directly access the dialog box in which the corresponding parameter can be set. |
|
| HiPath 3000/5000 V9, Manager E, Administrator Documentation, Issue 10 | up  |
|
| Disclaimer & Copyright | ID: P31003H3590M1000176A9 | 2014-03-03 |